A House Becomes Your Home…

Have a ‘Home Sweet Home’ photo album…for each house you live in (if it’s more than one!)

Find photos of the house when it was first built…

IMG_9318

Use the photo of the house from the real estate listing.  Take photos of the house before you buy it, if possible.

IMG_9319

As many rooms and views as you can.  Then take photos of these rooms while you’re doing the demolishing/revamping/redecorating.  And finally take photos after you’ve transformed them!

Do this with the landscaping, too.

You will love seeing the before and after pictures of your home.  It is so great to see all the work you put into it together and the details that you add to make it your own.

And others will always be interested in seeing these albums, too.  They yawn and come up with multiple excuses to leave when you break out the family photo albums.  But show them your home, before and after, and they will be enthralled!

And you will be too, as you look back on the house that became your home.

Kielbasa and Cheese Tortellini Soup

IMG_9159

As a New Englander, there is just nothing better than a hearty soup in the middle of the winter.  It warms you up from the inside, is comforting and I swear it wards off colds!

This one is a meal, in and of itself.  The meat, the pasta, the veggie and don’t forget the cheese!  A bowl of this deliciousness, a chunk of bread and a side salad…….doesn’t get any better than this.

Oh, and did I mention that it takes no time at all to make this soup and to cook it?  If you’re a whiz at chopping, I bet you could make and serve this soup within a half hour!

Let the savory adventure begin!

IMG_9144

Add a couple of tablespoons of olive oil to a large pot over medium-high heat.

IMG_9145

Add 1 chopped onion,

IMG_9146

4 cloves of minced garlic,

IMG_9147

12 ounces of Polska Kielbasa, sliced thinly,

IMG_9148

about 1 1/2 tablespoons chopped fresh thyme,

IMG_9155

and 1/2 teaspoon of crushed red pepper.

Sauté about 11 minutes, until the vegetables are tender and the kielbasa is brown.

IMG_9152

Add 8 cups of a “Swanson-like” natural chicken broth.

IMG_9153

Then add 2 cups of water to the pot, along with 2 teaspoons of powdered chicken bouillon, or 2 chicken bouillon cubes, for added depth and flavor.

Bring to a boil.

While you’re awaiting the boil on your soup, IMG_9150

Add enough salt to a pot of water to make it taste like the ocean and bring to a boil.

Boil a 9-12 ounce package of cheese tortellini per its specifications.

Drain.

Set aside.

IMG_9154

Once your soup is bubbling away, stir in about 4 cups of chopped kale.

Reduce heat to low and simmer till the kale is wilted, 5 minutes or so.

IMG_9157

Add at least 1 teaspoon of salt.  Taste and add more if necessary.

IMG_9156

Add at least 1/4 teaspoon of pepper.  Taste and add more if necessary.

Here comes the assembly:

IMG_9158

Put some of the cooked tortellini in a soup bowl,

IMG_9159

Cover with the soup and sprinkle with freshly shredded parmesan cheese.

Serves 6.

How’s that for easy and gourmet?!

Bon Appétit, Ma Chérie!


Fruity Juice Jello

IMG_9280

Fruity Juice Jello!  Yummy and Fresh and Fun and……….

wait for it………….

Healthy!

This is such a great little recipe to make with your kids, or for them.  Children love jello and they will love the fruit you add to this if they help make this dessert.

And the best part about this is that you can make it using any fruit juice or fruit that you love, that your kids love, that’s lying around your house or that’s in season!

Let the sweet adventure begin!

IMG_9250

Pour 1 cup apple juice into a small saucepan.

IMG_9257

Sprinkle 2 envelopes (1/4 oz each) unflavored gelatin

IMG_9258

over the apple juice in the pan.

IMG_9259

Let sit till gelatin plumps up, about 2 minutes.

IMG_9261

Set saucepan over medium-low heat and stir until the gelatin is dissolved and the liquid is completely clear, about 5 minutes.

IMG_9262

Remove saucepan from heat and pour liquid into a large mixing bowl.

IMG_9264

Add remaining 3 cups of apple juice and stir until well blended.

IMG_9266

Cover the bowl with plastic wrap, leaving the spoon in it, and set in refrigerator.  Chill, stirring whenever you remember to, for about 1 hour.  ( Don’t stress out about stirring.  Completely forgot one time and it came out fine.)

IMG_9251

Cut up about 3/4 cup green grapes in half, and toss them into a small bowl,

IMG_9252

add about 1/2 cup of blueberries,

IMG_9253

and 3/4 cup chopped strawberries.

IMG_9267

After an hour test to see if the gelatin mixture is ready to take out of the fridge by dropping one piece of “lighter” fruit into it.  If it “floats”, it’s ready!

IMG_9268

Add the mixed fruit,

IMG_9269

and gently stir it in.  The fruit will be suspended in the gelatin (Looks super-cool! Tastes even better!)

IMG_9270

Pour the mixture into an 8 inch baking dish,

IMG_9272

cover with plastic wrap and refrigerate until firm, about 5 hours or overnight.

Spoon into serving dishes or cut into 9 squares and serve.

9 Servings

Get your kids invested in the dessert and excited about eating it by having them give you a hand.  They’ll be thrilled!

Bon Appétit, Ma Chérie!

Nail Files Everywhere You Look

IMG_9277

Take it from me, you need one of these everywhere!

My Dad has always said that you can tell a lot about a woman from the upkeep of her fingernails.  Who made him the expert, I don’t know!  But it’s always stuck with me…

Meaning that if you’ve got ragged edges and uneven nails, you may not make it as a hand model anytime soon!

I am not promoting that anyone should make that their primary focus.  I am just promoting the look of well-kept fingernails.

And this can be extremely simple, no matter how busy you are!

As long as you have them filed, evenly, it will look as though you care.

Since most of us with kids, homes, jobs, hubbies, hobbies, etc don’t have nail maintenance at the top of their list of priorities, a little reminder here and there is much needed.

Buy nail files in bulk.  At least 3 in a package.  And start scattering them around where you’re bound to run into them or at least know where to look in those cases of the “emergency nail break”!

  • By your bedside table.
  • In the console of your car.  (In the console of your husband’s car.)
  • In the glove compartment of your car. (In his glove compartment, too.  Don’t worry he won’t mind…)
  • In your purse.
  • In the bathroom.
  • In the drawer of the coffee table.
  • In the misc. drawer you know you have in the kitchen!
  • In the garage.

You never know when your nail may break and God-forbid you run into the President of the United States and have to shake hands with him…What kind of woman would he deem you with that raggedy nail?!


Secure Your Featherbed-Finally!

IMG_9245

I am not afraid to admit that it has taken me about 5 years to come up with a solution as to how to secure my featherbed to my mattress.

But let me save you the trouble of trial and error!

So, I have this luxurious White Goose Feather & Down featherbed that is just heaven to sleep on.  It isn’t too soft so that you feel as though you are sunken into the bed while you sleep and it isn’t too hard so that you feel stiff in the morning.  It is just right.

Except for the fact that it will not stay still!

I have tried and failed, umpteen times, to get this ridiculous bedding to stay put on my mattress and not slide around while we’re tossing and turning at night.  It always slides out under the fitted sheet, so that your head ends up directly on the mattress about 3 inches lower than your body.  Rather irritating!

I read up on possible solutions to my problems and have bought and tried probably all of them, to no avail:

  • cover with a mattress protector first and then your fitted sheet
  • use comforter clips to secure at 4 corners of bed
  • snap strips
  • duvet donuts
  • non slip mats
  • extra deep pockets on sheets
  • sheet straps
  • safety pins! (What was I thinking listening to this advice?!)

IMG_9247

Um, hello!  Of course they’re going to pop open with all of the shifting that goes on in a bed and end up scratching or spearing someone unsuspecting…

No. No. No.  Don’t even bother…you’ll just get frustrated and want to throw the featherbed, mattress, boxspring and bed out the window!

This is such an easy answer and absolutely foolproof.

Sew it onto the mattress!

Yup.  Sew it.  And you don’t need to know how to sew to do this…you’re basically just making a double knot with embroidery thread!

IMG_9238

You’ll need an embroidery needle (or any needle you have with a large “eye”.  Costs about $0.49.  And some embroidery thread.  Nothing fancy.  Whatever you’ve got lying around is fine.  You don’t need much…maybe 3 feet of it.

Pass it through the eye of the needle and bring the short end all the way down to meet the long end.  you are essentially going to “double up” your thread.  Make a knot.

IMG_9239

Line up the edge of your featherbed with the edge of your mattress.  There should be a “lip” on both.  The “lip” shows the actually seam and you’ll see stitching there. (You can see the “lip” on the mattress; it’s gray in color.)

IMG_9241

Stick your needle under the lip of the featherbed and through the lip of the mattress.

IMG_9240

Then repeat.

IMG_9244

Then tie a double knot in the back.

IMG_9243

And that’s it!  Repeat down the line of your featherbed, as often as you’d like.  I think I spaced mine out at about 9 inches apart.

IMG_9245

No more creeping down the bed and ending up with sagging sheets off the bottom of the bed!

Don’t Get the Boy Baby

IMG_9235

All last year my little Beach Rose would play with her dollies and her babies and at random would point at one of them and say to me, “her is a boy baby”.  Then she would go about calling her little “boy baby” her son.  Any of her girl babies could at any time lose their gender identity and become her newest “son”.

And my Beach Rose would play for hours with her boy and girl babies, talking about the different anatomy and how the boy babies liked to play with the trucks and the girl babies liked to play with their dollies.

Then for Christmas this year, I got the brilliant idea of telling my sister that my Beach Rose would loooooove to get a “real” boy baby doll.

They really do make them and they’re adorable and look completely different than the girl baby, even without clothes on.  (Not in that way…get your mind out of the gutter!)  They kind of have the protruding forehead look and a broader nose base.  And, of course, they have boy clothes.

Well, it was love at first sight.  He was immediately named Jonathon and introduced to all the other girl babies and treated like royalty…

and then all of a sudden he was being dressed in girl clothes.  And buried under piles of blankets and forgotten about for months.

I recently unearthed Jonathon and when I asked my Beach Rose why she wasn’t playing with him any more, she replied “I don’t really like Jonathon.  He’s not my favorite.”  When I asked why, she answered “Because I don’t really like boy babies.  I only like girl babies and pretend boy babies.”

Imagination is so much better than the real thing, sometimes.

Don’t get the boy baby.  It’s unnecessary.

She’d much prefer to pretend her girl babies are experiencing a gender identity dilemma!


Hair Frizz

Screen Shot 2016-02-22 at 9.09.16 PM

I grew up vigorously rubbing my hair with my towel after taking a shower.  That was how I had seen others dry their hair quickly and I had heard that this “lifted” the roots of your hair and made it more “voluminous”!

Do you ever look back on things like this and wonder, “What was I thinking?!”

The lesson learned?

My hair definitely didn’t get dry any more quickly and I never saw the “volume” I had been promised.  But what did my hair get?

A lot of split ends!

“Scrubbing” your hair with your towel, or “towel-drying” your hair, will result in the breakage of your hair from all of the friction and cause a lot of frizz.

And no amount of ant-frizz serum can help you when you’ve got split ends all over your head and little broken bits of hair sticking straight up from your scalp!

The best way to dry your hair without damaging it is to pat your hair dry with your towel.  Or, lightly wrap the towel around your head for a few minutes to soak up any access water.

Looking for a shortcut?  None here! You might have to set the alarm clock 10 minutes earlier if you want to maintain that gorgeous head of hair of yours!

Party Cookies

IMG_8845

Cookies that will make you and your kids party after you’ve had one!  They are SO good…

…and so simple to make…

…and easy to remember the recipe…

Let the sweet adventure begin!


IMG_8825

Cream together 1 cup brown sugar,

IMG_8826

with 1/2 cup of white sugar,

IMG_8827

and 1 cup of shortening,

IMG_8828

for about 5 minutes on medium-high with your paddle on.

IMG_8836

Add 2 eggs and 1 1/2 teaspoons vanilla.

IMG_8838

Mix thoroughly.

IMG_8829

In a large bowl, measure out 2 1/4 cups of all-purpose flour.

IMG_8831

Add 1 teaspoon baking soda,

IMG_8832

and 1 teaspoon salt to counter all the sweetness (Awwwwww!).

IMG_8833

Whisk to combine.

IMG_8839

Add dry ingredients to the creamed mixture in the mixing bowl

IMG_8830

and mix well.

IMG_8842

Reserve 1/2 cup of M & M’s to decorate the tops of the cookies.


IMG_8841

Take the other 1 cup of the M & M’s and add them to your batter. Fold them in with a spatula.

Do NOT turn on your mixer with the M & M’s in there!  I speak from experience!  Stay away from the off/on switch!  You will have pulverized pieces of candies in your cookies and you and your children will cry.

IMG_8843

Turn out the dough in tablespoonfuls on a buttered sheet pan.  Press some of the reserved M & M’s onto the tops of the cookies to make them that much more beautiful and irresistible.

IMG_8844

Bake at 375 degrees for 8-9 minutes.

Makes 3-4 dozen Party Cookies.  Wondrous Party Cookies!

I mentioned in the beginning of this post that this recipe was a cinch to remember and that’s because it is your basic chocolate chip cookie dough recipe, only with 1/4 cup more brown sugar and 1/4 cup less white sugar, and of course the “Party” portion of them, the M & M’s!

“Nem N M” Cookies, as my Beach Rose calls them!

Bon Appétit, Ma Chérie!

Beef & Potato Stir-Fry

IMG_9039-001

Don’t you just love the idea of a stir-fry?  Just spend about 10 minutes chopping, 2 minutes stirring together a sauce, 5 minutes stir-frying and yummmmy!

This meal is so divine.  I made it last week to join in the Chinese New Year festivities, stateside.  It is simple, a one pan dish, packed with flavor and…

best of all, it takes no time to make.

Let the savory adventure begin!

FOR THE VEGGIES:

IMG_9014-001

I use 3 russet potatoes,

IMG_9015-001

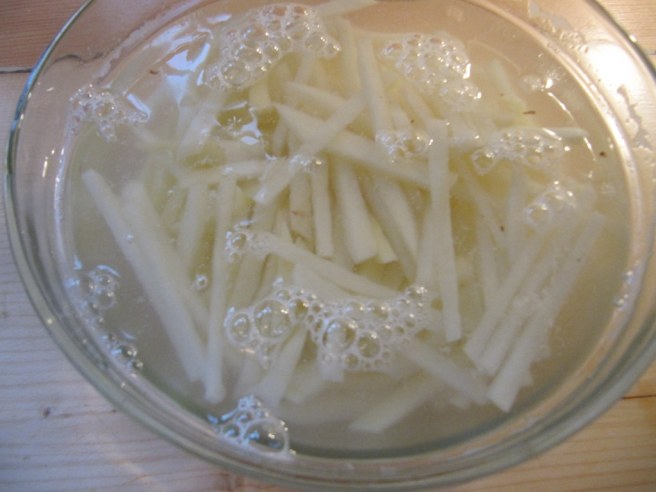
peel and french-fry cut them.

Then I submerge them in a bowl of cold water, till I need them, to reduce the amount of starch in the potatoes so that your fries will be crispier and so that your potatoes do not turn brown before you cook them!

IMG_9021-001

Peel and mince 2 cloves of garlic,

IMG_9024-001

cut a medium onion and 2 medium tomatoes into thin wedges, and cut one medium green pepper into 1-inch slices.

IMG_9022-001

And then get your hands on about 6 ounces of snow peas!

Have all of your veggies ready to go and set aside.


THE BEEF:

IMG_9025-001

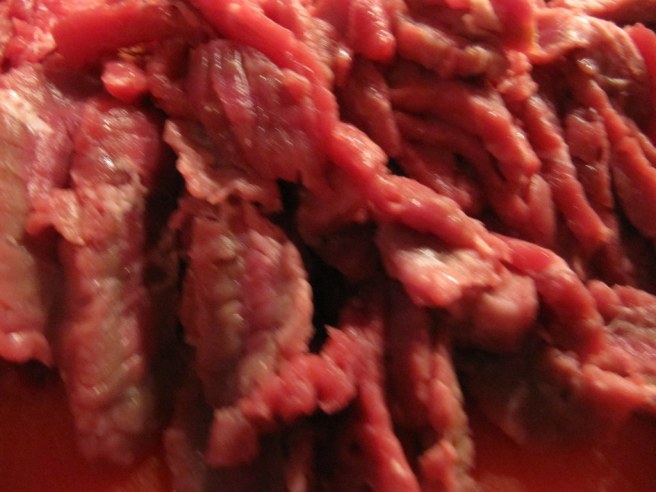
Partially freeze about 12 ounces of top-round beef.  Slice thinly across the grain into bite-size pieces.

Set aside.


THE SAUCE:

IMG_9016-001

In a small bowl, add 1/2 cup of water,

IMG_9017-001

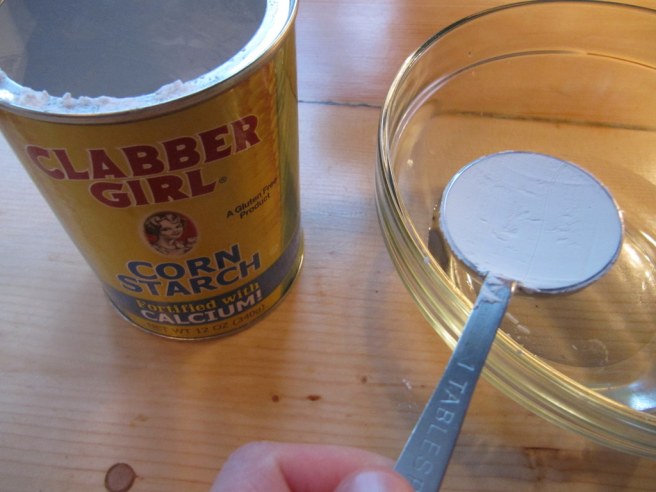
1 tablespoon cornstarch,

IMG_9018-001

3 tablespoons fish sauce, (Even if you find the flavor or taste of fish sauce off-putting, stay with me and add it to the sauce.  It does have a strong odor, but you will not taste it and it adds a depth to the sauce that wouldn’t happen without it!)

IMG_9019-001

1/4 teaspoon freshly ground pepper,

IMG_9020-001

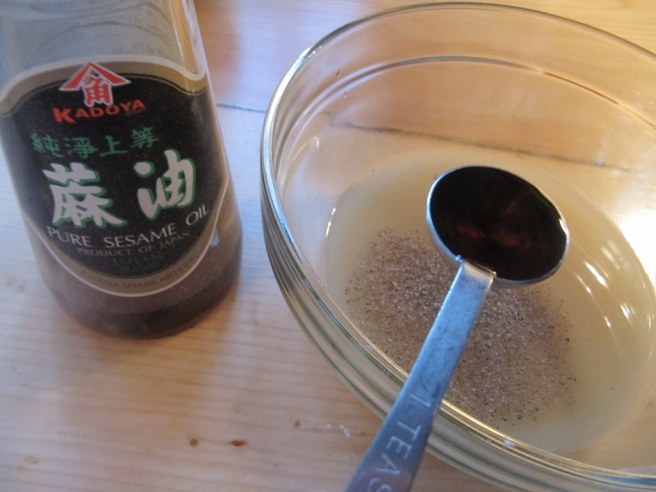
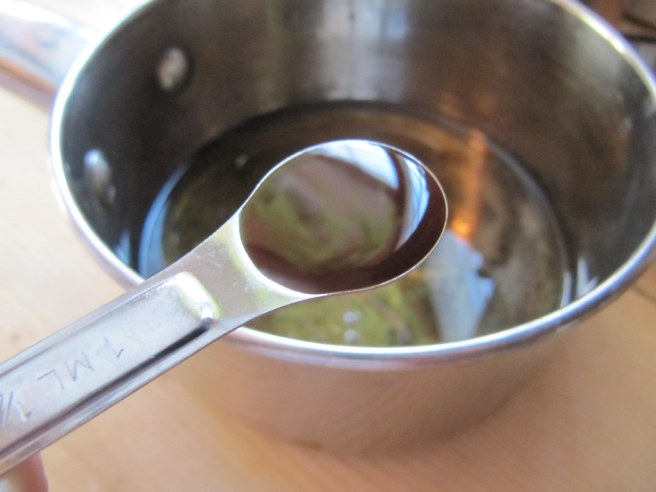
1 teaspoon sesame oil and stir to combine.  Set aside.

THE STIR-FRY:

IMG_9027-001

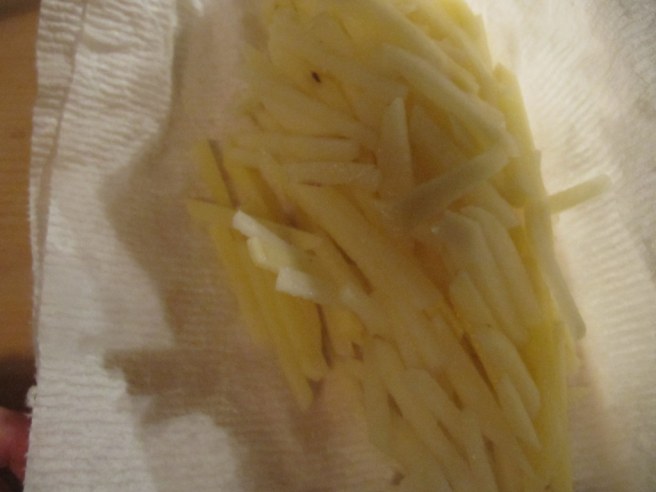
Drain the potato strips and pat dry on a paper towel.

IMG_9029-001

Stir-fry garlic and potatoes in 1 tablespoon vegetable oil, over medium-high heat, for about 6 minutes or until tender.

Remove potatoes from pan.

IMG_9030-001

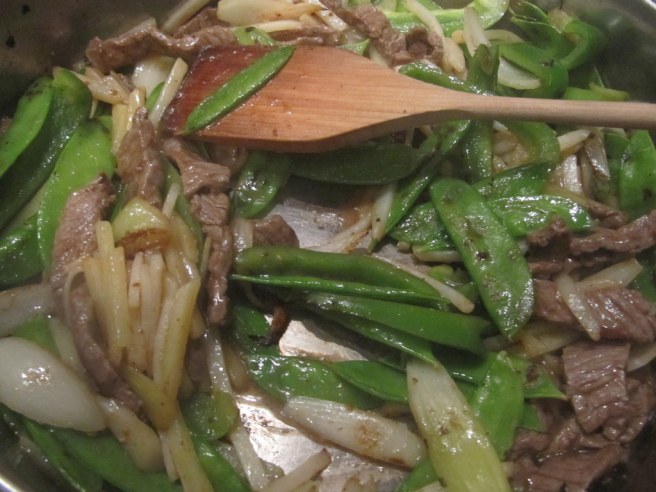
Add the onion and stir-fry for 1 minute.

IMG_9031-001

Add the green pepper strips and snow pea pods.  Stir-fry for about 2 more minutes; you still want them to be crisp.

IMG_9032-001

Remove the vegetables from the pan.

IMG_9034-001

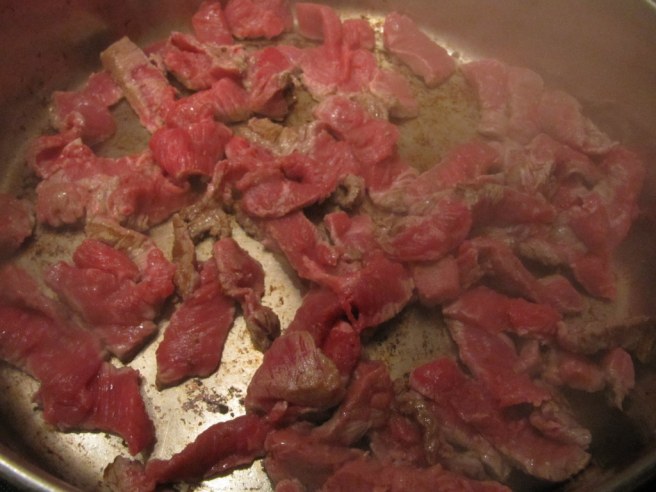
Add the beef to the hot pan and cook for 2-3 minutes.  Push beef to sides of pan.

Stir the sauce and add to the center of the pan.  Cook and stir till bubbly and thickens up.

IMG_9035-001

Return the cooked vegetables to the pan and stir till everything is coated by that amazing sauce and is shiny and irresistible.  Go ahead and reward yourself for all of your hard work in the kitchen and try one of the delicious veggies…mmmmmmmm

IMG_9036-001

Gently stir in tomato wedges.  Heat through.

IMG_9037-001

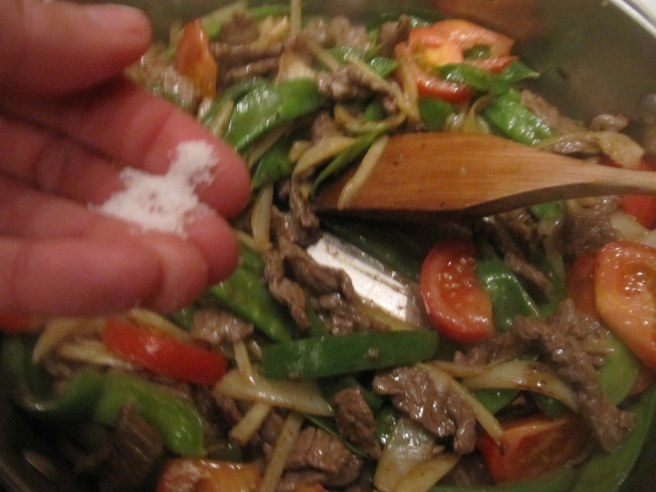
Add a generous pinch of salt, at least 1/2 teaspoon.

IMG_9038-001

Add a pinch of pepper, at least 1/4 teaspoon.

IMG_9039-001

Add some fresh chopped cilantro for a note of brightness on each serving.

Absolutely wonderful!

Serves 4.

Bon Appétit, Ma Chérie!


Delicious Granola

IMG_9102

No, I’m serious.

It is delicious.

This granola is so simplistic that it cannot offend anyone.  There aren’t a lot of foreign objects in it that my hubby couldn’t identify.  ( He never touches granola, so the fact that he liked it is testament to how yummy this is!)  There aren’t a lot of huge chunks of anything, so its taste is very subtle.

And best of all, it doesn’t taste like cardboard.

Now the only trick here is not to just put it in the oven and walk away…it needs a little babysitting because it can be temperamental and burn quickly.

Small price to pay for the ease and taste of this, not to mention the fact that you could make this in 30 minutes!

Let the sweet adventure begin!

IMG_9092

Combine 3 cups of Quaker Old Fashioned Oats in a large bowl,

IMG_9094

with 1/4 cup roasted, salted sunflower seeds,

IMG_9095

and 1/4 cup minced fresh dates. (Doesn’t matter if you don’t like them, you will never be able to make them out in this recipe because they are cut into such tiny pieces and just add a hint of sweetness.)

IMG_9096

Heat together in a small pan, 1/4 cup pure vegetable oil,

IMG_9097

with 1/4 cup honey,

IMG_9098

and 1/4 teaspoon vanilla until it just comes to a boil.

IMG_9099

Pour heated liquid over the oat mixture and mix well to coat all the dry ingredients.

IMG_9100

Spread onto greased baking pan.

Bake at 325 degrees for 15-20 minutes.

Watch it closely!  It does burn easily and that can be mighty frustrating to have happen to you…

IMG_9101

Let it cool and then store the granola in an airtight container.

Makes about 2 pounds.  And will be gone in a couple of days.

Serve as a snack, as cereal for breakfast with milk, over yogurt, over ice cream, etc.

Oh, and though I believe that the beauty of this granola is in the restraint of the number of its ingredients, you could easily make this recipe yours and add so many things:

  • pumpkin seeds
  • dried cranberries
  • raisins
  • coconut
  • pistachios
  • dried cherries
  • almonds
  • etc…

Bon Appétit, Ma Chérie!